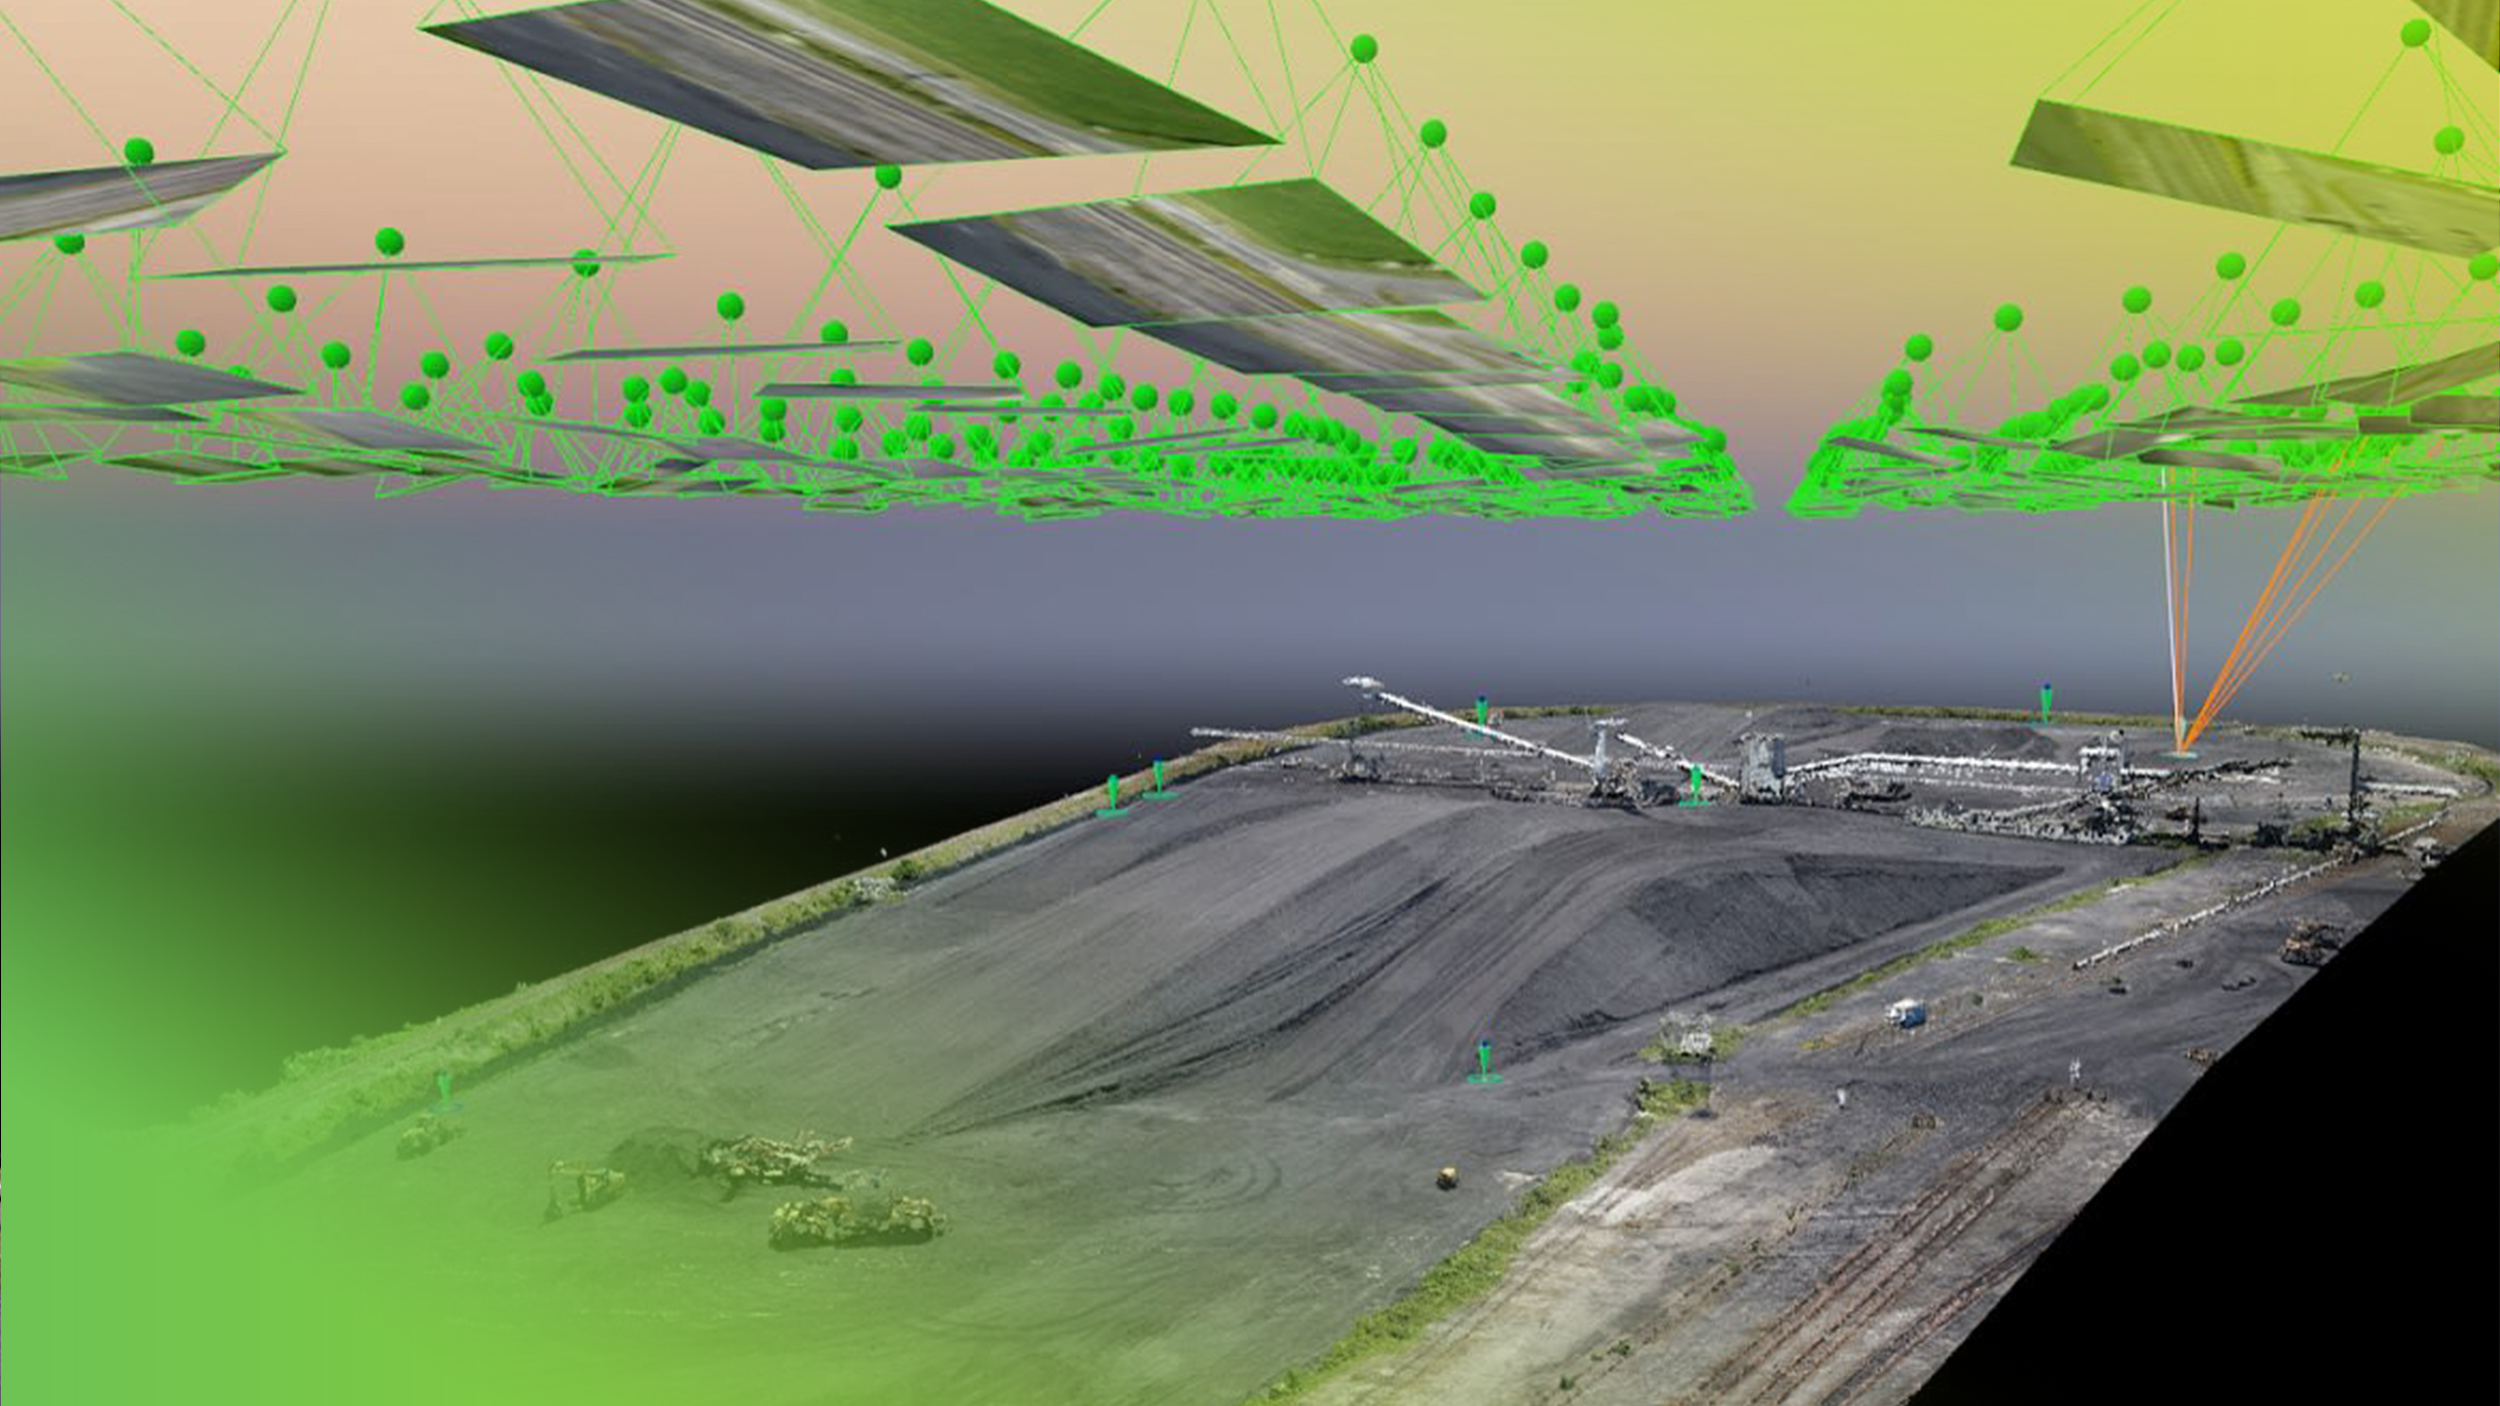
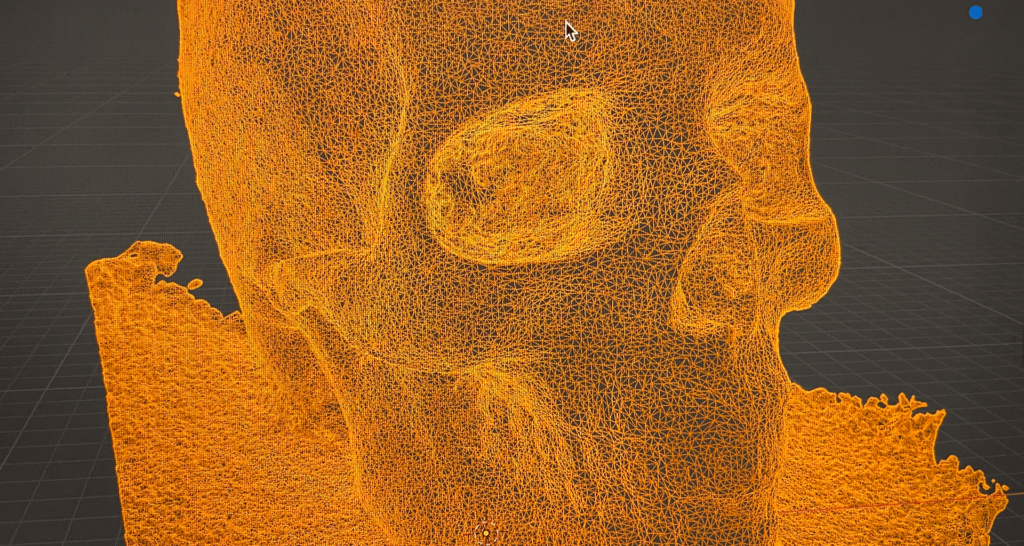
Photogrammetry is the art and science of using photographs to create accurate, three-dimensional models of objects or scenes. Through advanced software, photogrammetry translates a series of two-dimensional images into a digital 3D structure that mirrors the details, depth, and dimensions of the original subject. This technique has transformed various fields like architecture, archaeology, construction, and gaming, where precise 3D models are crucial for design, analysis, and planning.
The foundation of photogrammetry lies in the principle of triangulation: using multiple photos from different angles to determine spatial relationships and create a full-scale model. This process involves capturing images from all necessary angles and then feeding them into photogrammetry software to align and process the data into a cohesive 3D shape.
Why Photo Quantity Matters in Photogrammetry
One of the critical elements in photogrammetry is the number of photos captured. The quantity directly impacts the accuracy, detail, and quality of the final model. More photos typically result in a more refined, detailed model since the software has additional information to work with, leading to better depth, texture, and structure.
However, capturing an excessive number of photos can slow down processing times and, in some cases, might even be redundant. So, the challenge is finding that “sweet spot”: capturing enough images to create a detailed model without overwhelming the software or wasting time with unnecessary images.

Basics of Photogrammetry: How It Works
The Process of Photogrammetry
Photogrammetry is a straightforward but multi-step process that translates photos into a digital 3D model. Here’s a basic overview of the steps involved:
- Image Capture: Multiple images are taken from various angles, ensuring there’s enough coverage and overlap.
- Data Alignment: The software identifies common points between images and aligns them to determine the object’s dimensions and depth.
- Model Generation: Using triangulation, the software reconstructs the 3D shape by building a mesh from the aligned points.
- Texturing and Finishing: The final step involves overlaying color and texture data onto the model, enhancing its realistic appearance.
Each of these steps is important for ensuring accuracy and quality. If any of the initial photos are blurred, poorly lit, or lack coverage, the resulting model may have gaps or distortions. For this reason, taking the right quantity and quality of images is essential.
Types of Photogrammetry: Aerial, Close-Range, and Terrestrial
Not all photogrammetry projects are created equal; the types of photogrammetry—aerial, close-range, and terrestrial—have distinct approaches and often require different numbers of photos:
- Aerial Photogrammetry: Commonly used for large-scale landscapes, like mapping terrain or surveying infrastructure. Drone cameras capture the images, requiring hundreds or even thousands of photos for full coverage.
- Close-Range Photogrammetry: Suitable for small to medium objects like artifacts, sculptures, or even people. In this type, users work closely around the object to capture all perspectives, usually needing fewer images but requiring precise angles and lighting.
- Terrestrial Photogrammetry: Ideal for large, ground-based structures like buildings or archaeological sites. This method involves setting up cameras at specific distances to capture multiple angles, generally requiring more photos for accurate 3D model creation.
What Makes a Good Photogrammetry Image?
To ensure accurate results, it’s important to capture high-quality images that are well-lit and in focus. A good photogrammetry image typically meets the following criteria:
- Clear and Sharp: Blurry or low-resolution images can result in missing data or inaccuracies in the model.
- Consistent Lighting: Lighting variations can create issues during model processing. Ideally, shoot in natural, even lighting conditions.
- Ample Overlap: Overlapping areas between images (generally 60-80%) help the software stitch images together seamlessly.
- Correct Perspective: Capture multiple angles to reduce “blind spots” and ensure all parts of the object are covered.
These principles apply across different photogrammetry types and set the foundation for a model with accurate dimensions and textures.

Determining the Ideal Number of Photos for Photogrammetry
General Guidelines: How Many Photos Are Needed?
The number of photos needed for photogrammetry largely depends on the size and complexity of the object you’re trying to model. Here are some general guidelines to help determine the ideal number:
- Small Objects (e.g., artifacts, small sculptures): Typically, 20-50 photos are sufficient. These objects are usually manageable in terms of angles and detail requirements, allowing for fewer images without sacrificing model quality.
- Medium-Sized Objects (e.g., furniture, vehicles): Plan to take around 50-200 photos. With larger objects, additional images capture finer details from different angles and prevent gaps in the 3D structure.
- Large Structures (e.g., buildings, landscapes): For objects on this scale, several hundred to over a thousand images may be necessary, especially if you need to capture intricate textures or structural details.
In general, more photos create higher-quality models but also increase processing time and data requirements. As a starting point, take the minimum recommended photos for each type and increase as needed to achieve the desired level of detail.
Balancing Quality and Efficiency
Striking a balance between quality and efficiency means finding a point where you’re capturing enough data without overloading the software. Here are some considerations:
- Minimum Photo Count: The minimum photo count should cover all necessary angles and avoid large “blind spots.” For small projects, start with at least 20-30 photos.
- Avoiding Redundancy: Too many overlapping images or redundant angles can make the model-building process cumbersome and time-intensive. Stick to the essentials by capturing all key perspectives without overdoing it.
Using software that analyzes photo coverage and guides you on missing areas can help find this balance.
When More Photos Are Necessary
There are scenarios where more photos are essential to ensure model accuracy. Some instances include:
- Complex Textures and Patterns: Intricate surfaces, like woven fabrics or detailed carvings, often require more images to capture texture accurately.
- Intricate Shapes with Fine Details: Projects with high levels of detail, such as architectural elements or historic artifacts, benefit from extra images to capture every angle and nuance.
- Projects Requiring High Precision: Fields like archaeology, engineering, or forensics demand high accuracy, which generally requires additional photos.
How Overlap Affects Photo Count
In photogrammetry, image overlap is crucial for stitching together images into a coherent 3D model. High overlap (typically around 60-80%) helps the software find matching points between images, ensuring alignment. However, overlap requirements vary:
- 60-70% Overlap: Suitable for simpler objects and quick projects, requiring fewer photos. This level captures the basic structure with adequate detail.
- 70-80% Overlap: Ideal for complex structures or high-detail requirements, this range may increase the photo count but significantly improves model accuracy.
Note: Increasing overlap usually leads to higher accuracy but can also demand additional processing power and memory. Tailor your overlap and photo count based on your computer’s capacity and the project’s detail needs.

Factors Influencing the Number of Photos Needed
Object Size and Complexity
One of the primary factors in determining how many photos are needed for photogrammetry is the size and complexity of the object. Larger objects, or those with intricate details, will generally require more photos to capture every angle and ensure no details are missed.
- Small, Simple Objects: For items like handheld objects (e.g., a cup or small statue) with minimal texture or complexity, fewer photos (around 20-50) are often enough to achieve an accurate model.
- Complex or Textured Objects: If the object has intricate patterns or textures—think of a carved wooden sculpture or a rock with complex surfaces—you’ll need more images to capture these fine details accurately. Aim for 50-100 photos in these cases.
- Large or Architectural Structures: Large buildings, statues, or complex installations typically require hundreds to thousands of photos. Multiple angles, close-ups, and broad perspectives are needed to cover all areas and capture a high level of detail.
Level of Detail Required
Different projects demand different levels of detail. A high-detail 3D model of a museum artifact will require more images than a simpler model of a basic geometric shape. The level of detail affects:
- Resolution Needs: High-resolution models require more image data, hence more photos.
- Close-Ups for Detailed Areas: If specific areas need more clarity (e.g., facial features on a statue), additional images focused on these spots will be necessary.
For projects requiring high precision or high detail, you’ll likely need additional close-up shots on specific areas, which increases the total photo count.
Camera Quality and Lens Type
The type of camera and lens also influences the number of photos required. Higher-quality cameras with greater resolution capture more detail per image, potentially reducing the total photo count. However, lens choice affects coverage and depth of field:
- Wide-Angle Lenses: These lenses capture a broader field of view, which can help cover more of the object in fewer images. However, wide angles can introduce distortion, so they’re generally better suited to larger objects.
- Standard Lenses: A standard lens (50mm equivalent) often works well for small to medium objects, capturing natural-looking proportions and details without distortion.
For large structures or architectural sites, a high-resolution DSLR or mirrorless camera with interchangeable lenses offers the flexibility to adapt to different scenes and detail needs.
Environmental Conditions
Environmental factors—like lighting, weather, and the location (indoor vs. outdoor)—play a big role in photogrammetry and may affect how many photos you need:
- Lighting: Poor or uneven lighting can create shadows and highlights that make it harder to capture consistent details, often requiring additional images to fill gaps. Outdoor shoots might need more images at different angles to counteract shadows, while indoor projects benefit from controlled lighting that can reduce photo count.
- Weather Conditions (For Outdoor Projects): Clouds, rain, and shifting light conditions can impact how clear and consistent your images are. For example, capturing images on a cloudy day provides diffuse light and fewer shadows, making it easier to use fewer photos while maintaining quality.
- Reflection and Texture Challenges: Shiny or reflective surfaces (like glass or metal) can cause light distortions. Taking more photos from varied angles helps mitigate these issues and improves model accuracy.